Refining in the Browser: Get Pixel Perfection With Visual Inspector
Being “pixel perfect” is something which became less important for web designers once we all accepted that websites can look different across different screens and devices. But that doesn’t mean attention to detail is any less desirable. In this tutorial I’m going to introduce you to a tool (a Chrome extension) which can help you achieve pixel perfection in your web designs.
Introducing Visual Inspector

Using Visual Inspector
First of all, go to www.canvasflip.com/visual-inspector to download the Chrome extension. Once installed, you’ll be asked to sign up for an account (free, but upgrades are available from $5 per user, per month). You’re up and running!


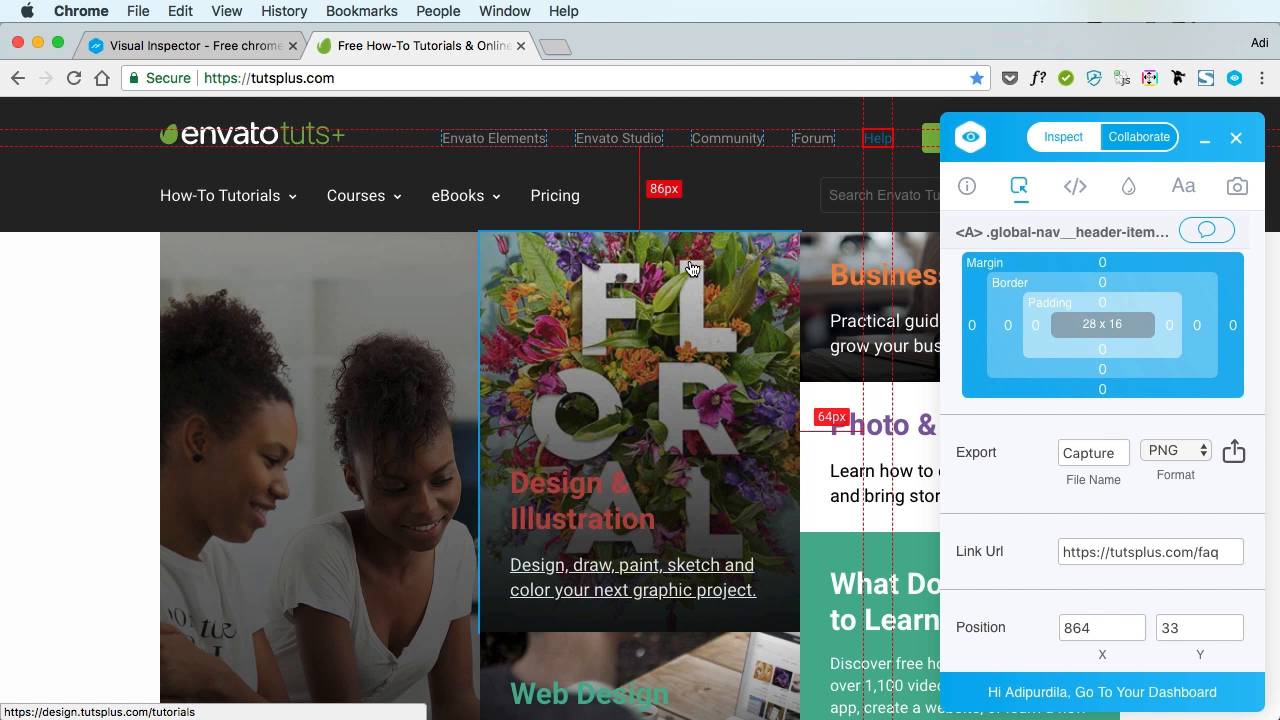
The inspector allows you to select any element on the page and examine its properties. Here’s what the inspector shows when we select the logo on the Tuts+ homepage, for example:


We can see the markup used, and the various classes assigned to the element. We can also see padding, border, and other styles applied. We can see the image source in this case, and by scrolling down we can see much more besides.
Export
At this stage we can export any assets we can see. Image files, though not in SVG format, are readily available to grab. Even text and other styles can be exported to JPG or PNG and taken to the design application of your choice, which is really useful.
Measurements
Moving your mouse around the browser and clicking on various elements will reveal measurements and alignment, specified and implied, helping you get a solid idea of where everything is in relation to everything else–and helping you achieve pixel perfection.


Altering and Saving Properties
As with many other inspection tools for the browser, you can alter properties and styles of any elements you like. However with Visual Inspector, as you might inspect, all styles are alterable with visual tools (sliders, color pickers and so on).
Once changed, you can hit the CSS Output button to reveal the new styles you’ve created.
Alternatively, you can hit Sync Changes on the Info tab and your edits will be saved to your account. This allows you to revisit those changes in the future–something which ordinary browser inspectors don’t allow for by default.


Conclusion
Visual Inspector is a great tool for those who enjoy refining in the browser. Examine what already exists, make whatever changes you wish, then export those changes or save them for later. And if you upgrade, you can collaborate with team members too. Go and check it out then let us know what you think in the comments!
Learn More About Collaboration for Designers


 9 Real-Time Code Collaboration Tools for Developers

 Dennis Gaebel27 Feb 2018

 3 Tips for Collaborating With Your Design Team

 Joanna Ngai01 Jun 2017

 Tools to Bridge the Gap Between Designers and Developers

 Manny Henri11 Jul 2016

 Sketch and Zeplin: Helping Designers and Developers Collaborate

 Andreia Paralta Carqueija25 Apr 2016


