

From social media to documentary film, using parallax to create motion from a single still image has become a popular and effective video technique. In this tutorial I'll show you how to do it in Adobe Photoshop using the Animated Parallax Tool Kit Photoshop Action.
Here's what we'll make:
Or you could make something like this:

Or like this:

What You Need
Before you get started, you need to install the pattern, brush and action files that come with the download.


Next, make sure your image is RGB and in 8-bit colour mode.
Luckily, the help video associated with this action is actually helpful. It goes through every option with you and also explains the saving options. It's rare documentation that's this useful. We do cover all the basics here, though, so hopefully you won't need the extra help.
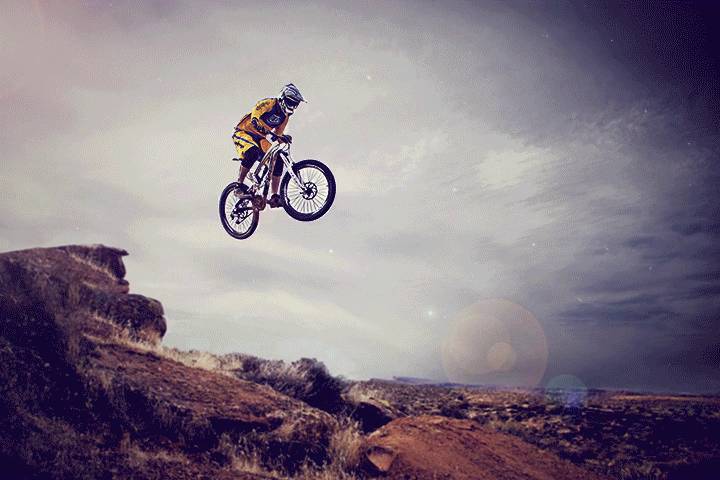
Lastly, you'll need an image to work on. Here's mine:


I choose this image for two reasons. First, the composition has implied movement—your brain wants the biker to complete her jump. Second, the layers are easily distinguishable, so it won’t be complicated to brush over.
How to Use the Parallax Effect
Open Actions and find the parallax effect.
When you press play, the action will briefly stop and ask you to brush over your main object; in our case, the bike.


Brush in the Object to Isolate
Be as neat as you can with it. If your background is quite plain then it won’t be as obvious if you include some of that too.


In this case, I’ve coloured over the whole wheel rather than trying to do each spoke. It should look okay because of the relatively plain background, but if the background was detailed then it would be more obvious.
When you’ve brushed over it and you’re happy, press play again.
If you don’t have your timeline visible, it might be useful to change that now. Go to Window > Timeline.


When the timeline appears you’ll notice that you now have layers, or tracks in the Timeline window, as well as some grouped layers in the Layers panel


At this point, if you hit play on the timeline, you’d see a preview (rough) version of the movement. At this point, technically you have your GIF or movie clip, but there’s more we can do.
Make the Object Stand Out
If we want to make the front object (in this case the bike) stand out from the background more, we can sharpen it. Click add sharpness to object and press play. You’ll see a dialogue box asking you to select your layer:


Click on the Front Object layer in your Layers panel and then hit play again on the action. You can use the add blurriness to object layer to blur your background, too.
Scrolling down the action list will give you a number of additions to include on your photo—these include particle and light effects.
Add Particles and Lens Flare
Add particles by clicking on Particle V1 and pressing play.


You can then shake the particles, to add further movement. Click on Shake the Particles and open up Particles Displacement Map from your download file:


You can add in lens flare too, just click that option in the list and run the action.


Change the Colour
The Instagram Colour Options, when played, will run for a little while and give you several colour options that you can then turn on and off to see how they look. Here’s an example with X-Pro Filter turned on.


Each of the colour options is then broken down into layers, so you can adjust and brush out effects as appropriate.
Save Your GIF or MP4
Hopefully you’ve been saving all the way along, but now click Save and go to the Preview. If you’re happy, then you can follow the instructions and go ahead and export as a GIF. Be sure not to use any of the resize options until you have a saved version of your original.
Alternatively, you can go to File > Export > Render Video or Save As and choose the GIF or MP4 option.
Build on What You've Learned
This action is complicated, but if you watch the help video and start with the easier of the options like the one I've gone through here, then it won't be long before you're more comfortable with how it all works and can more easily achieve your desired effects.
The options get more in depth and rather than just selecting your foreground object and moving it, you can also select the background and midground and then have 'movement' across each element.
There's also a nifty text creator so you can throw that in too, useful for social media sharers. With Facebook now allowing little videos for profile pictures and even page headers, learning how to make short animated images from stills in Photoshop could be a really useful tool.


