
This sponsored post features a product relevant to our readers while meeting our editorial guidelines for being objective and educational.
In this series, we've been learning about Channels from Pusher, a platform that allows you to give your users the seamless real-time experience they want.
Private channels provide your applications with a secure, private medium for publishing messages. The best part is how easy it is to implement and use private channels for your apps. You'll learn how to use them in this post.
A Better Chat App
In the previous video, we looked at a very simple chat application that had no users and no security; it was just anonymous chat. It works, don't get me wrong, but we can do better! So in this video, we'll look at a slightly different version of that chat application. The front-end is mostly the same, but the back-end is a Laravel application.


Setting Up the Server
Even though the app is powered by Laravel, the same principles are used to handle our messages. Instead of a single file, we now have a ChannelsController to handle our Channels-oriented stuff, and it has a sendMessage() method that handles incoming chat requests from the client. You can see its code below:
1 |
public function sendMessage(Request $request) { |
2 |
|
3 |
if (!Auth::check()) { |
4 |
|
5 |
return new Response('Forbidden', 403); |
6 |
|
7 |
}
|
8 |
|
9 |
|
10 |
|
11 |
$data = $request->json()->all(); |
12 |
|
13 |
|
14 |
|
15 |
$data['user'] = Auth::user()->name; |
16 |
|
17 |
|
18 |
|
19 |
$this->pusher->trigger('anon-chat', 'send-message', $data); |
20 |
|
21 |
}
|
I want to protect our chat so that only authenticated users can access it, and you can see in the above code that it checks if the user is authenticated before it triggers the send-message event. That's a good start, but it is not enough to fully protect our chat because anyone who has access to our application key and cluster information can potentially subscribe to and listen for any messages sent over our application's public channels. To completely protect our chat, we need to use a private channel to send our messages, and the first step is to create a private channel.
To create a private channel, we simply trigger an event on a channel with a private- prefix. So we can change the previous call to trigger() to be the following code:
1 |
$this->pusher->trigger('private-chat', 'send-message', $data); |
This code will now send our messages through the private-chat channel, and from the server's perspective, that is the only thing the server needs in order to send messages over a private channel. Clients, however, need to authenticate in order to subscribe to a private channel, and they do so by sending requests to a specialized endpoint.
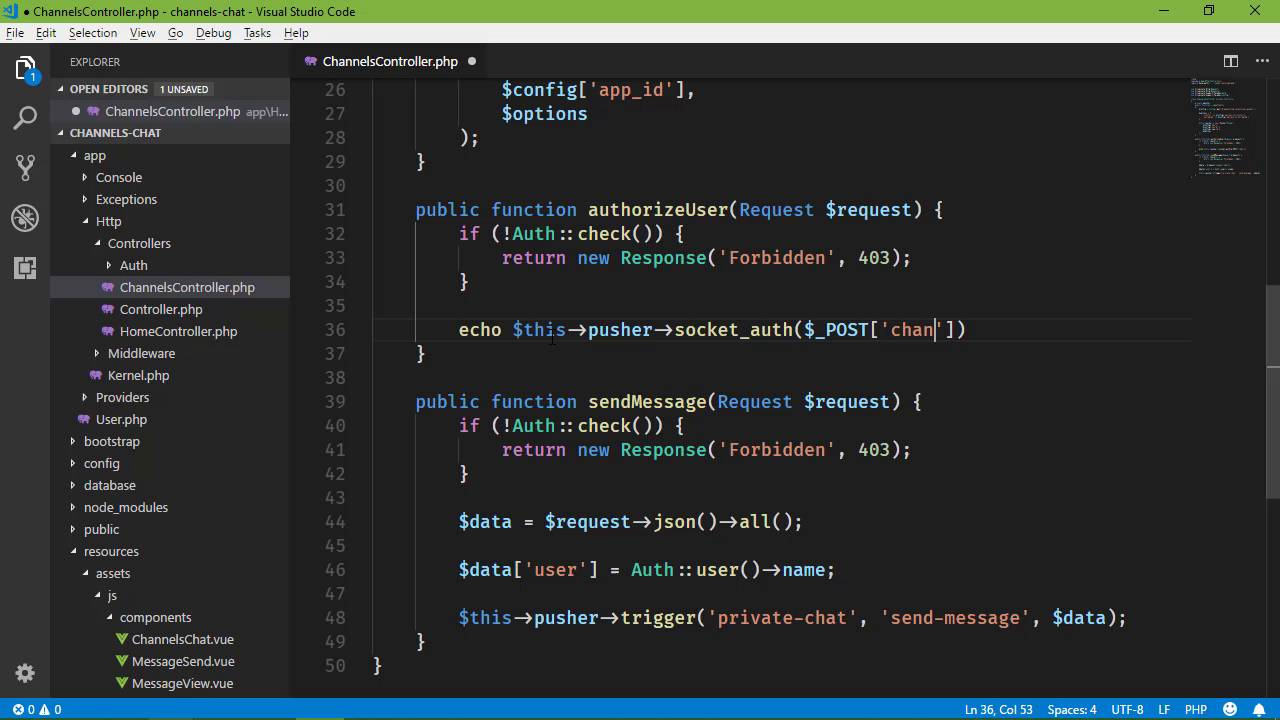
Writing the Client Authorization Endpoint
When a client library attempts to subscribe to a private channel, it issues a POST request to an authorization endpoint. This endpoint has a single job: to determine if the user is authenticated and respond with an appropriate response. A new method called authorizeUser() will handle this request, and its code is very simple.
1 |
public function authorizeUser(Request $request) { |
2 |
|
3 |
if (!Auth::check()) { |
4 |
|
5 |
return new Response('Forbidden', 403); |
6 |
|
7 |
}
|
8 |
|
9 |
|
10 |
|
11 |
echo $this->pusher->socket_auth( |
12 |
|
13 |
$request->input('channel_name'), |
14 |
|
15 |
$request->input('socket_id') |
16 |
|
17 |
);
|
18 |
|
19 |
}
|
It first checks the user's authentication status, and it responds with 403 Forbidden if the user is not logged in. But if the user's auth check passes, the authorizeUser() method needs to output a special value that is derived from two values from the request's body.
The output is generated by the Pusher library's socket_auth() method, as shown in the above code. If the resulting output matches the value expected by the client library, then the client is authenticated and can subscribe to the private channel.
Thankfully, this whole process is automated; we just have to configure the client to send authorization requests to this endpoint.
Configuring the Client
When you create a Pusher object for the client library, you can configure the resulting object to send authentication requests to a specific endpoint. Simply add an authEndpoint option and set it to the URL of your endpoint, as shown in the following code.
1 |
let pusher = new Pusher('427017da1bd2036904f3', { |
2 |
|
3 |
authEndpoint: '/channels/authorize', |
4 |
|
5 |
cluster: 'us2', |
6 |
|
7 |
encrypted: true, |
8 |
|
9 |
auth: { |
10 |
|
11 |
headers: { |
12 |
|
13 |
'X-CSRF-Token': this.csrfToken |
14 |
|
15 |
}
|
16 |
|
17 |
}
|
18 |
|
19 |
});
|
20 |
|
21 |
|
22 |
|
23 |
let channel = pusher.subscribe('private-chat'); |
You can also set any authentication headers with the auth option. This code sets the X-CSRF-Token header to prevent cross-site request forgery attacks.
Now, when the client attempts to subscribe to a private channel, it will authenticate using the provided endpoint URL and allow or deny access to the channel based on the response.
Conclusion
Using private channels dramatically increases the security of your application, and configuring your applications to use them is a breeze. With Channels from Pusher, it is incredibly easy to add secure real-time communication to your apps, and it doesn't even require a lot of code!


